Upload Inspections to POSM Central
Use the Upload tab in the POSM Data Sync Tool to upload inspections from a local POSM installation to POSM Central.
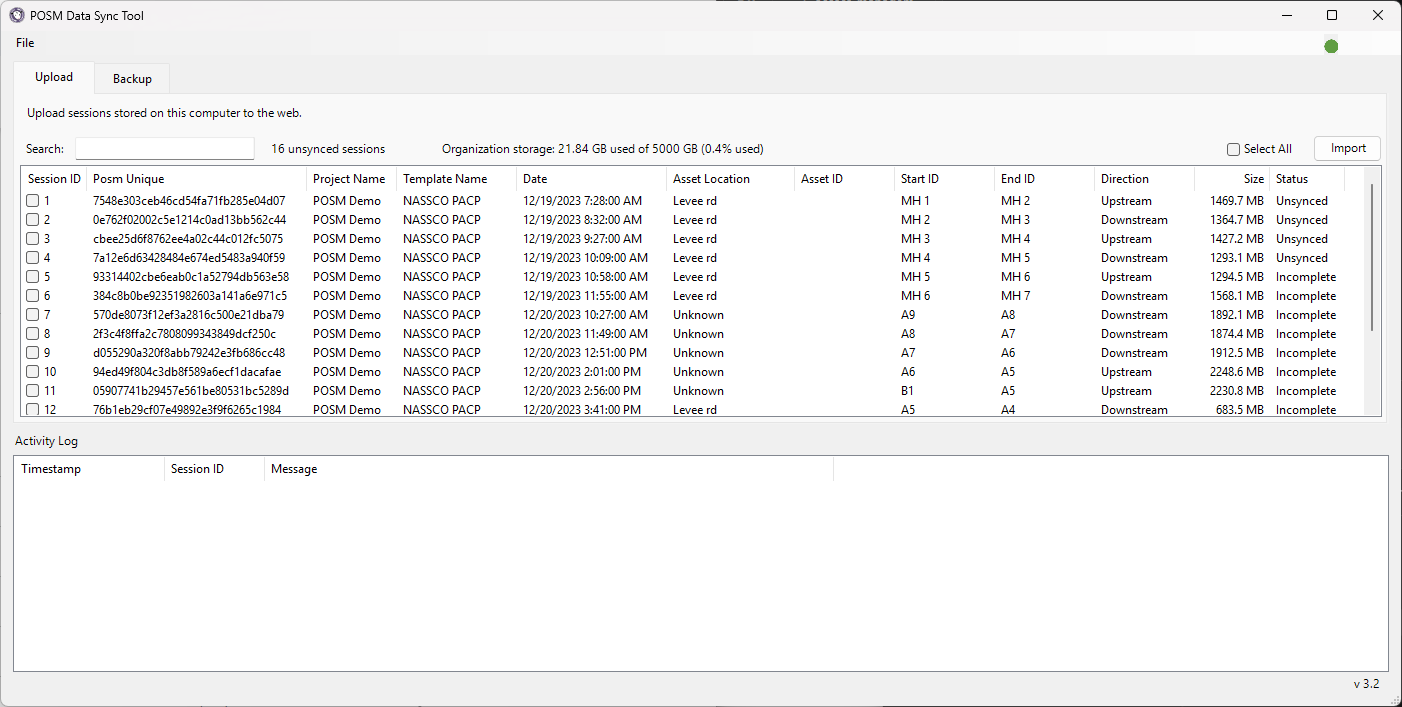
The Upload tab is the default workspace displayed after signing in.
Upload direction
Upload moves inspection data from:
Local POSM → POSM Central
Before You Upload
Before uploading inspections, make sure:
- POSM Data Sync is configured for the correct POSM database.
- The POSM Media Folder Path points to the correct media location.
- The ScanCam Folder Path is correct when ScanCam data is used.
- You can sign in with your POSM Central account.
- Your organization has enough available POSM Central storage.
- NASSCO inspections pass the required validation.
Configure the POSM Data Sync Tool
Launch POSM Data Sync
-
Open the POSM Data Sync Tool from your computer.

-
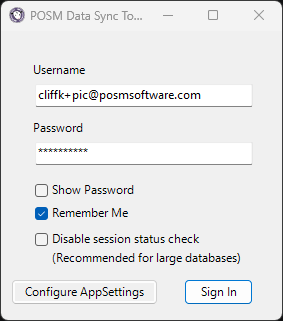
Enter your POSM Central Username and Password.
-
Click Sign In.
The application opens to the Upload tab.
Large POSM databases
If the local POSM database contains thousands of sessions, Disable session status check (Recommended for large databases) can reduce the initial loading time.
Review the Upload Tab
The Upload tab displays inspections from the configured local POSM database.
The session list includes information such as:
- Session ID
- POSM Unique
- Project Name
- Template Name
- Date
- Asset Location
- Asset ID
- Start ID
- End ID
- Direction
- Size
- Status
Click a column heading to sort the displayed sessions.
Use the Search field to locate a specific inspection or group of inspections.
Check Available Storage
The Upload tab displays the organization's POSM Central storage usage.
Review the available storage before uploading a large number of inspections or inspections containing large video files.
If the organization has reached its storage limit, new inspection data cannot be uploaded.
Select Inspections to Upload
You can upload one inspection, multiple inspections, or all available inspections.
Select Individual Inspections
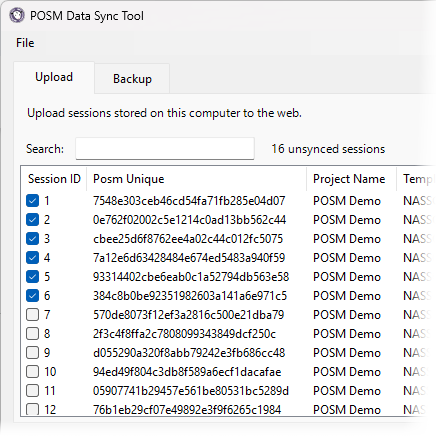
Select the checkbox beside each inspection you want to upload.
Select a Range of Sessions
To select a consecutive range of sessions:
- Select the checkbox beside the first session in the range.
- Scroll to the last session you want to include.
- Hold Shift on the keyboard.
- While holding Shift, select the checkbox beside the last session.
Data Sync selects the first session, the last session, and all sessions between them.
Select a large range quickly
Shift-select is useful when you want to upload a consecutive group of sessions without selecting each checkbox individually.
Select All Inspections
To select all available inspections, select Select All.
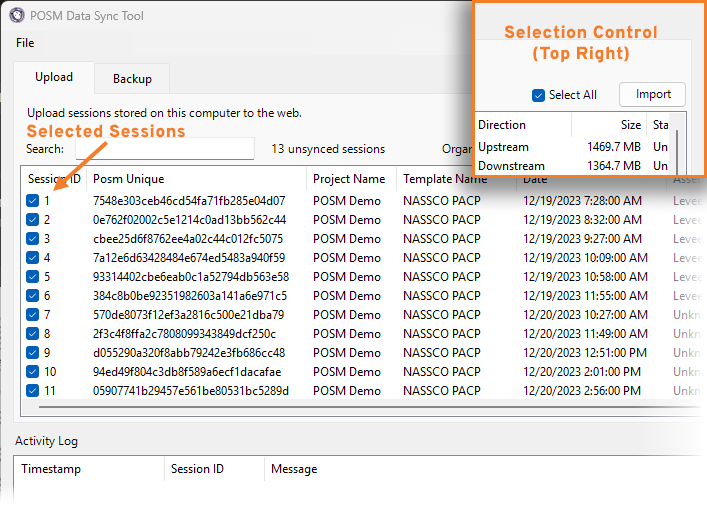
Use Search, sorting, and individual checkboxes when you only need to upload specific inspection data.
Upload the Selected Inspections
After selecting the inspections:
- Review the selected sessions.
- Click Import.
Import uploads inspections to POSM Central
The action button on the Upload tab is labeled Import.
In this workflow, clicking Import uploads the selected inspections from the local POSM installation to POSM Central.
Data Sync begins processing the selected inspections.
Monitor Upload Progress
The Activity Log at the bottom of the application shows the progress of the upload.
The Activity Log contains:
- Timestamp
- Session ID
- Message
During a normal upload, messages may indicate that Data Sync is:
- Beginning the session import
- Importing session data
- Importing observation images
- Importing video files
- Completing the session and media import
A successful upload ends with a message indicating that the session data and media were imported successfully.
Watch the Activity Log
The Activity Log is useful for identifying which session is currently being processed and whether Data Sync encounters a problem.
Upload Complete
When Data Sync finishes processing the selected inspections, a confirmation appears.
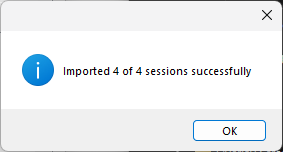
Review the confirmation to see how many selected sessions were imported successfully.
After a successful upload, the inspection data is available in POSM Central according to your organization's access and permissions.
NASSCO Validation Errors
NASSCO inspections must pass the required validation before they can be uploaded to POSM Central.
If an inspection has NASSCO validation errors, correct those errors in the POSM application before attempting the upload again.
What to Do
- Open the affected inspection in POSM.
- Validate the inspection for NASSCO compliance.
- Review the validation errors.
- Correct the inspection data in POSM.
- Validate the inspection again.
- Return to Data Sync after the inspection passes validation.
- Upload the inspection again.
Validate NASSCO Sessions in POSM
Fix validation errors in POSM
NASSCO validation errors must be corrected in the POSM application.
Data Sync does not correct the inspection data.
Missing Media Files
Data Sync uses the configured POSM Media Folder Path and ScanCam Folder Path to locate files associated with an inspection.
If expected files or folders cannot be found, Data Sync may display a warning identifying the affected Session ID and missing path.
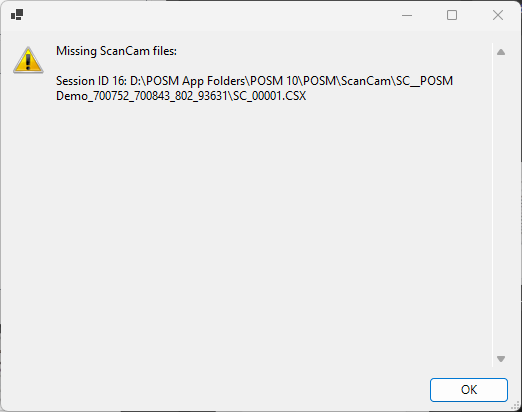
Problems may include:
- Missing inspection media folders
- Missing ScanCam files
- Missing ScanCam folders
- Incorrectly configured media paths
What to Do
- Note the affected Session ID.
- Review the missing file or folder path shown by Data Sync.
- Verify that the expected file or folder exists.
- Verify the configured POSM Media Folder Path or ScanCam Folder Path.
- Correct the file location or configuration as needed.
- Try the upload again.
Configure the POSM Data Sync Tool
Incomplete Uploads
If the Status column shows Incomplete, the session did not finish synchronizing successfully.
An incomplete upload may occur when Data Sync cannot locate required inspection media or encounters another synchronization error.
Review:
- The Activity Log
- Any warning displayed by Data Sync
- The Exceptions log
- POSM Media Folder Path
- ScanCam Folder Path
- NASSCO validation status
After correcting the problem, try uploading the inspection again.
Unexpected Server Error
If the Activity Log reports an unexpected server error:
- Note the affected session.
- Try the upload again.
- Review the Activity Log and Exceptions log.
- If the error continues, contact POSM Support.
When contacting Support, provide:
- The affected Session ID
- The Data Sync Tool version
- The error message
- Activity or exception log files when requested
After Uploading
After the inspection has uploaded successfully:
- Sign in to POSM Central.
- Open Session Management.
- Locate the uploaded inspection.
- Verify that the session information is present.
- Open the inspection and confirm that its reports and media are available as expected.
Verify important uploads
When uploading important inspection data, verify the completed inspection in POSM Central before relying on the Central copy.