Install the POSM Data Sync Tool
The POSM Data Sync Tool is generally installed and initially configured by POSM Support.
The Data Sync installer is not provided as a general public download. Contact POSM Support when Data Sync needs to be installed or configured for a POSM system.
What POSM Support Installs
POSM Support installs the components required by the Data Sync Tool.
These normally include:
- Microsoft Access Database Engine 64-bit —
accessdatabaseengine_X64.exe - Microsoft ODBC Driver for SQL Server —
msodbcsql.msi - The current POSM Data Sync Tool —
PosmDataSync-win-Setup.exe
These components allow Data Sync to communicate with supported POSM databases and POSM Central.
POSM Support handles the initial installation
You normally do not need to locate or install these components yourself.
POSM Support will install and configure the appropriate components for your POSM system.
Install POSM Data Sync
POSM Support runs the current POSM Data Sync installer.
During installation, the setup window displays the installation progress.
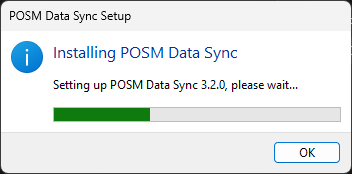
When installation is complete, POSM Data Sync can be opened and configured for the local POSM installation.
Installation Location
POSM Data Sync is installed for the current Windows user under the user's Local AppData folder.
A typical installation location is:
C:\Users\<username>\AppData\Local\PosmDataSync
Additional Data Sync settings are stored under the user's Roaming AppData folder:
C:\Users\<username>\AppData\Roaming\PosmDataSync
AppData paths are user-specific
The exact paths depend on the Windows user account running POSM Data Sync.
Some application files are stored under Local AppData while additional Data Sync settings are stored under Roaming AppData.
First Launch
Open the POSM Data Sync Tool after installation.
The Data Sync login window appears.
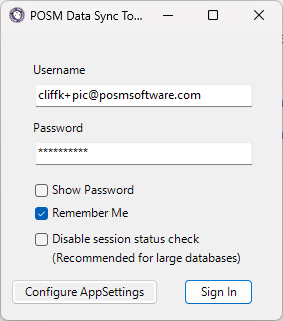
Before Data Sync can synchronize inspection data, it must be configured for the local POSM installation.
From the login window, click Configure AppSettings to review or configure the application settings.
Initial Configuration
A new Data Sync installation may initially contain blank or placeholder paths that must be configured for the POSM system.
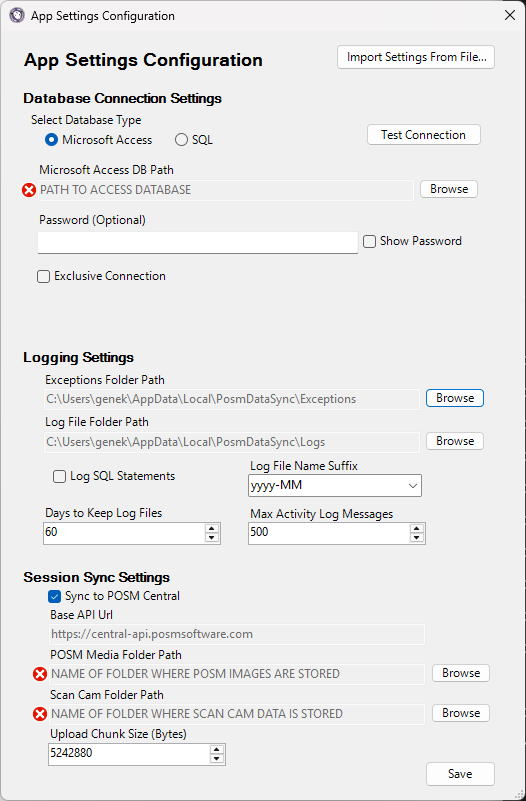
Configuration is divided into three main areas:
- Database Connection Settings
- Logging Settings
- Session Sync Settings
The configuration identifies the POSM database, logging locations, POSM Central connection, and inspection media locations used by Data Sync.
Configuration must match the POSM installation
The database and media paths must point to the POSM installation being synchronized.
Incorrect paths can prevent Data Sync from locating inspection data, video, images, or ScanCam files.
Configure the POSM Data Sync Tool
Import Settings From an Existing Installation
If you already have a working Data Sync configuration, the existing settings can be imported instead of entering the configuration again manually.
This can be useful when reinstalling Data Sync, moving the application, or restoring an existing configuration.
From App Settings Configuration:
- Click Import Settings From File...
- Navigate to the existing Data Sync settings file.
- Select the file.
- Open the file.
POSM Data Sync loads the settings and displays a confirmation.
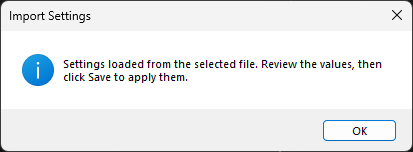
The message indicates that the settings were loaded from the selected file and should be reviewed before saving.
- Click OK.
- Review the imported configuration.
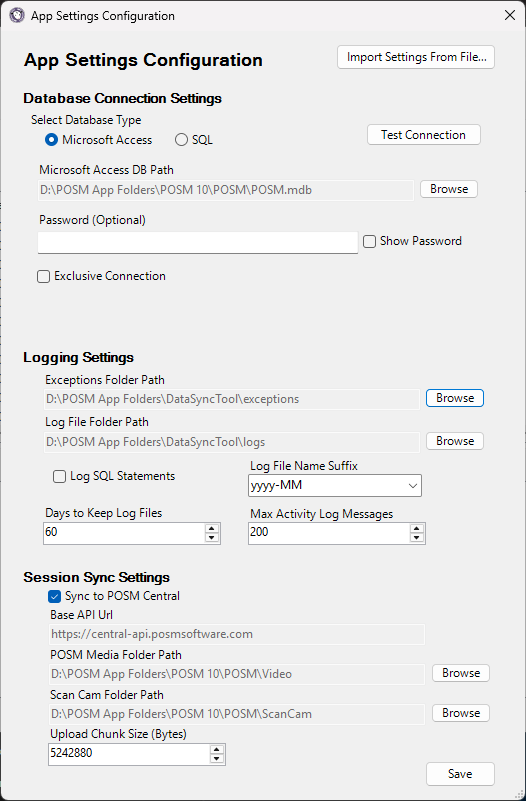
- Verify the database, logging, media, and ScanCam paths.
- Test the database connection.
- Click Save after confirming that the settings are correct.
Review imported settings
Importing an existing configuration can make setup much faster, but always verify that the imported paths are correct for the current POSM installation before saving.
Database Connection
Data Sync must be connected to the POSM database containing the inspections you want to synchronize.
Supported database configuration options include:
- Microsoft Access
- SQL
For a Microsoft Access POSM installation, the Microsoft Access DB Path should point to the appropriate POSM.mdb.
Use Test Connection to verify that Data Sync can connect to the configured database.
Test the connection
Test the database connection after configuring a new installation or changing database connection settings.
POSM Media and ScanCam Paths
Data Sync needs to know where the local POSM installation stores inspection media.
Review:
- POSM Media Folder Path
- ScanCam Folder Path
These folders are typically located within the applicable POSM application folder.
Data Sync uses these locations to find inspection video, images, ScanCam data, and other associated files during synchronization.
Missing files can cause incomplete synchronization
If Data Sync cannot locate expected media or ScanCam data, the affected inspection may not synchronize completely.
Save and Verify the Configuration
After configuring Data Sync:
- Review the database connection settings.
- Click Test Connection.
- Verify the logging paths.
- Verify the POSM Media Folder Path.
- Verify the ScanCam Folder Path.
- Verify that Sync to POSM Central is enabled.
- Click Save.
After saving the configuration, return to the Data Sync login window.
Sign In to POSM Central
Enter your POSM Central:
- Username
- Password
The login window also provides:
- Show Password
- Remember Me
- Disable session status check (Recommended for large databases)
- Configure AppSettings
Large POSM databases
Disable session status check can reduce the initial loading time when working with a large POSM database containing thousands of sessions.
Click Sign In to connect Data Sync to POSM Central.
After signing in, Data Sync opens to the Upload tab.
Verify the Installation
After installation and configuration:
- Sign in to Data Sync.
- Confirm that the Upload tab loads.
- Verify that inspections from the configured POSM database appear.
- Confirm that the organization's POSM Central storage information appears.
- Verify that the expected inspections can be located.
- Review the Data Sync version shown in the lower-right corner of the application.
You can then use Data Sync to upload inspections to POSM Central or back up Central inspections to the local POSM installation.
Upload Inspections to POSM Central
Back Up Inspections From POSM Central
Updating POSM Data Sync
POSM Data Sync can automatically update when a newer version is available and the application is launched.
In most cases, no manual reinstall is required for a normal application update.
After an update, verify that Data Sync opens normally and that the expected configuration is still available.
The installed Data Sync version appears in the lower-right corner of the main application window.
Automatic updates
Launching POSM Data Sync allows the application to update when a newer version is available.
Contact POSM Support if:
- Data Sync does not update correctly
- Data Sync no longer starts correctly after an update
- Configuration settings need to be restored
- Data Sync needs to be installed on a new computer
- You would like assistance reviewing or configuring the application
Uninstall POSM Data Sync
POSM Data Sync can be removed using the standard Windows application management tools.
To uninstall Data Sync:
- Open Windows Settings.
- Select Apps.
- Open Installed apps.
- Locate POSM Data Sync.
- Select the option to Uninstall.
- Follow the Windows prompts to complete the removal.
Data Sync settings
Some Data Sync settings are stored separately under the Windows user's Roaming AppData folder:
C:\Users\<username>\AppData\Roaming\PosmDataSync
Uninstalling the application may not necessarily remove these separately stored settings.
Reinstalling or moving Data Sync
If Data Sync is being removed as part of a reinstall or move to another computer, retain the existing configuration when appropriate.
Existing working settings can be imported into a new Data Sync installation using Import Settings From File....
Need Help With Data Sync?
POSM Support can install, configure, update, and troubleshoot the POSM Data Sync Tool.
You do not need to diagnose a Data Sync problem before contacting Support. You can start a POSM Remote Support session or call POSM Support for assistance.
POSM Support is available:
Monday through Friday 7:00 AM–7:00 PM Eastern Time