Back Up Inspections From POSM Central
Use the Backup tab in the POSM Data Sync Tool to download inspections from POSM Central into a local POSM installation.
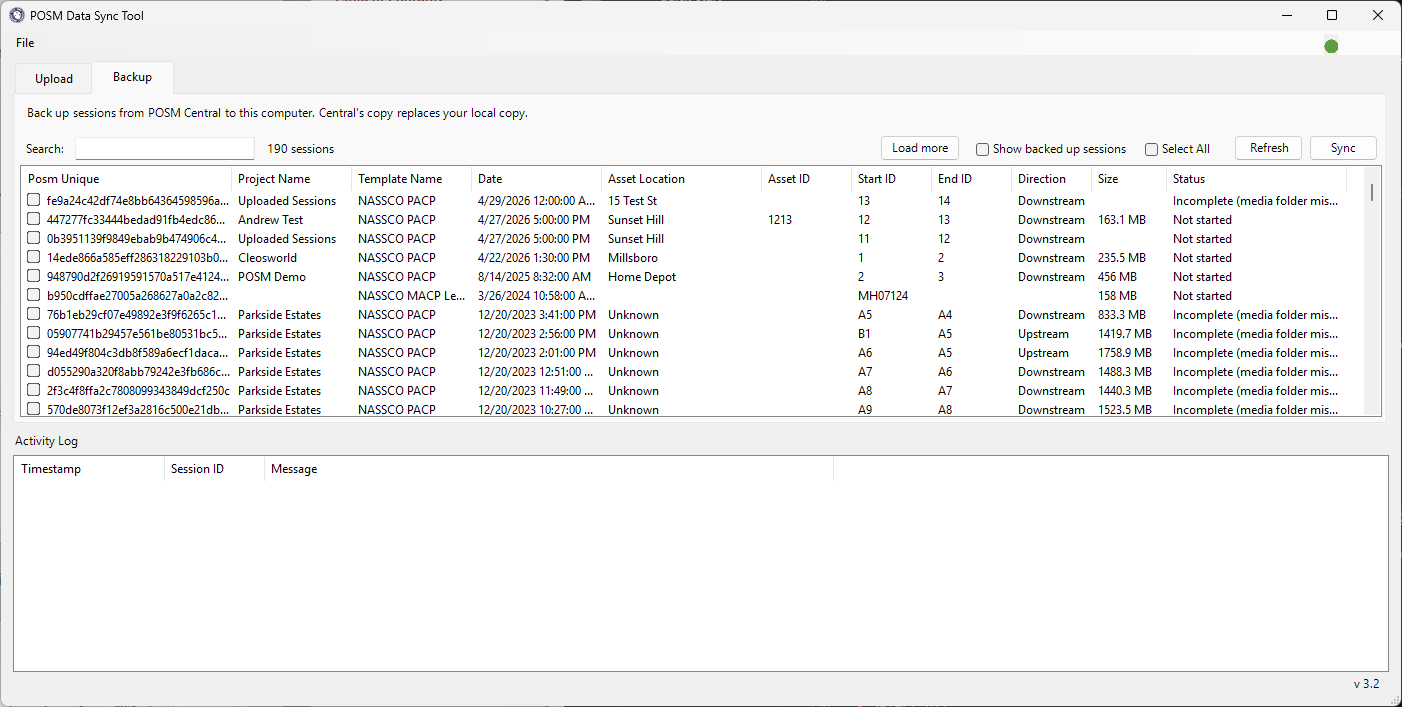
Backup direction
Backup moves inspection data from:
POSM Central → Local POSM
Use Upload for the opposite direction when you need to send local POSM inspections to POSM Central.
What Backup Does
The Backup workflow retrieves selected inspection data from POSM Central and writes it into the POSM database configured in the Data Sync Tool.
Depending on the inspection, Data Sync may retrieve and write:
- Session information
- Special fields
- Observations
- Images and other media
- Inspection video
- Additional reports
- ScanCam information
- Inclinometer information
Inspection media is downloaded to the appropriate local POSM media locations.
Check the configured POSM installation
Backup writes inspection data to the local POSM database configured in Data Sync.
Before beginning a backup, make sure Data Sync is connected to the POSM installation where you want the inspections to be downloaded.
Configure the POSM Data Sync Tool
Launch POSM Data Sync
-
Open the POSM Data Sync Tool.

-
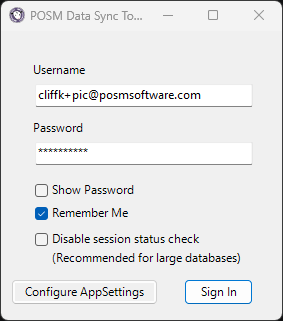
Enter your POSM Central Username and Password.
-
Click Sign In.
- Select the Backup tab.
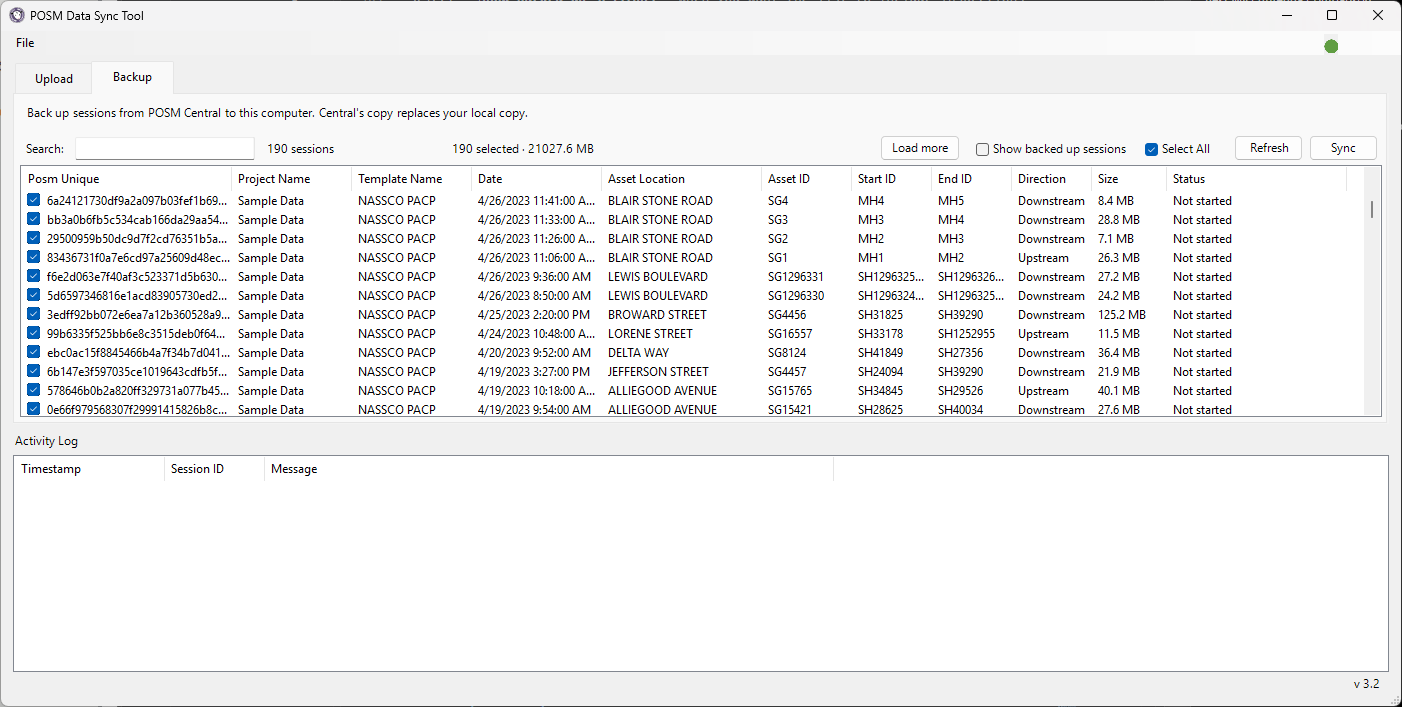
The Backup tab displays inspections available from POSM Central.
Review the Backup Tab
The Backup tab provides controls for:
- Search
- Load More
- Show backed up sessions
- Select All
- Refresh
- Sync
The installed Data Sync Tool version is displayed in the lower-right corner of the application.
Find an Inspection
Use the Search field to locate inspection data in the Central session list.
The Backup tab displays columns including:
- POSM Unique
- Project Name
- Template Name
- Date
- Asset Location
- Asset ID
- Start ID
- End ID
- Direction
- Size
- Status
Click a column heading to sort the displayed inspections.
Load More Inspections
The Backup tab may initially display only part of the available POSM Central inspection list.
Click Load More to retrieve additional inspections from POSM Central.
Continue using Load More when you need to browse inspections that are not currently displayed.
Refresh the Inspection List
Click Refresh to retrieve updated inspection information from POSM Central.
Use Refresh when the Central inspection list or synchronization status may have changed since the page was loaded.
Show Previously Backed-Up Sessions
Select Show backed up sessions when you want the list to include inspections that have already been backed up to the local POSM installation.
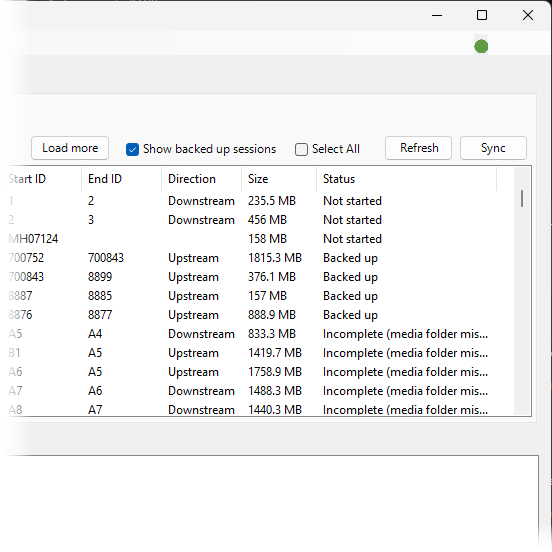
Previously backed-up inspections can be identified by their synchronization status.
Select Inspections to Back Up
You can back up one inspection, multiple inspections, or all currently available inspections.
Select Individual Inspections
Select the checkbox beside each inspection you want to download to the local POSM installation.
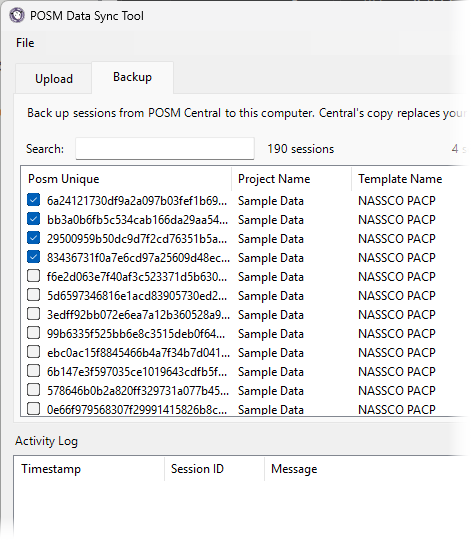
Select All Inspections
Select Select All to select all currently available inspections.
Confirm the selected inspections
Review the selected inspections before starting the synchronization, especially when using Select All.
Start the Backup
After selecting the desired inspections:
- Review the selected sessions.
- Click Sync.
Data Sync begins retrieving the selected inspection data from POSM Central.
Sync downloads the selected inspections
On the Backup tab, clicking Sync retrieves the selected inspection data from POSM Central and writes it to the configured local POSM installation.
Monitor Backup Progress
The Activity Log at the bottom of the application displays the progress of the backup.
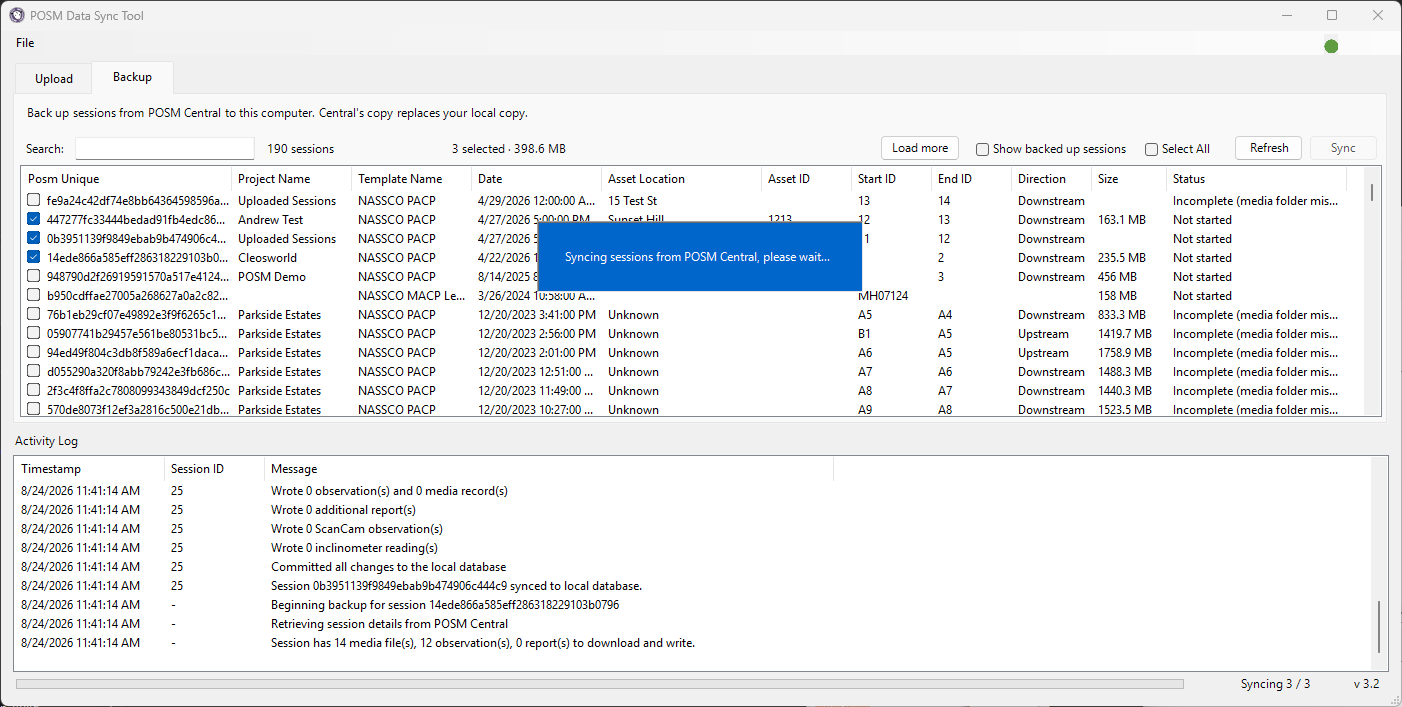
The Activity Log contains:
- Timestamp
- Session ID
- Message
During a backup, messages may indicate that Data Sync is:
- Beginning the backup for a session
- Retrieving session details from POSM Central
- Determining the number of media files and observations to download
- Downloading video and image files
- Writing session information to the local database
- Writing observations and media records
- Writing additional reports
- Writing ScanCam observations, when present
- Writing inclinometer readings, when present
- Committing changes to the local database
- Synchronizing the session to the local database
While synchronization is running, Data Sync may display:
Syncing sessions from POSM Central, please wait...
The lower-right corner shows which selected inspection is currently being processed, such as:
Syncing 3 / 3
Use the Activity Log to follow the backup
The Activity Log shows which inspection is currently being processed and provides useful information if a synchronization does not complete.
Backup Complete
When Data Sync finishes processing the selected inspections, a completion message appears.
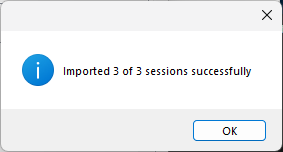
Review the message to confirm how many of the selected sessions were backed up successfully.
After the backup completes, the downloaded inspections are available in the configured local POSM installation.
Verify the Backed-Up Inspections
After completing a backup, open the local POSM application and verify the downloaded inspection data.
Check important inspection information such as:
- Session information
- Observations
- Images
- Video
- Reports or supporting information, when applicable
Verify important backups
Confirm important inspection data in the local POSM application after the synchronization completes.
Backup Status
The Status column indicates the backup state of each inspection.
Statuses may include:
- Not started
- Backed up
- Incomplete
A Backed up status indicates that the inspection has been synchronized to the configured local POSM installation.
If an inspection shows Incomplete, review the Activity Log for additional information.
Back Up an Inspection Again
To locate inspections that have already been backed up:
- Open the Backup tab.
-
Select Show backed up sessions.
-
Locate the desired inspection.
- Review its current status.
Use the available synchronization controls when the inspection needs to be retrieved again.
If a Backup Does Not Complete
If a selected inspection does not back up successfully:
- Review the Status column.
- Review the Activity Log.
- Note the affected inspection.
- Review any error message displayed by Data Sync.
- Try the operation again when appropriate.
You can also contact POSM Support at any time if you would like help investigating the synchronization problem.
Activity and Exception Logs
Data Sync maintains log files that can provide additional information about synchronization operations.
Information that can help POSM Support investigate a backup problem includes:
- The affected inspection
- The Data Sync Tool version
- Activity log files
- Exception log files
- Any displayed error message
- A screenshot of the problem, when available
You do not need to diagnose the problem
You can start a POSM Remote Support session or call POSM Support without determining the cause first.
The Data Sync logs can help the Support team investigate the issue with you.
Upload vs. Backup
Use the correct Data Sync tab for the direction you need:
| If you want to... | Use |
|---|---|
| Send inspections from the local POSM installation to POSM Central | Upload |
| Retrieve inspections from POSM Central into the local POSM installation | Backup |
Remember the direction
Upload: Local POSM → POSM Central
Backup: POSM Central → Local POSM
Upload Inspections to POSM Central